Learn How to Fix Wavlink AC1200 Router – Do 5 Steps
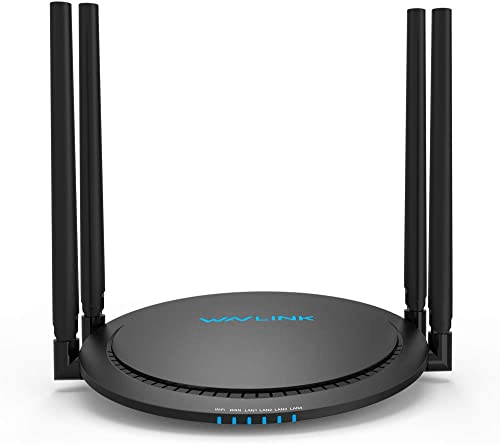
Wavlink router facing dead zones? No worries as we have solutions for this as the existing extender keeps on disconnecting with the wavlink router. Not just of the compatibility issues but also because of the improper setups.
If The Router Properly Performance Is Bad?
Sometimes the wifi.wavlink.com not working issue can make you more frustrated. As the network is not visible in the list and you can’t even connect wirelessly. But before the Wavlink AC 1200 Setup, you need to perform some troubleshooting steps. So let’s check up on the Steps.
Check The Compatibility Of The Device
You need to see whether your wavlink router is compatible with the existing Wavlink extender. You can see a list of the devices which are easily available in the user manual on the website of the Wavlink. The first thing to check is if the wavlink router does support your extender. If yes then reset the router. In addition, follow the instructions on setting up and configuring the router. But, If you still face trouble connecting to your Wavlink router, further steps are necessary to be followed.
Check The Power Supply
- In the beginning, you need to check the power supply.
- Then, you need to see if the router is plugged in well.
- If your answer is no, plug in the router again.
Note: Plug the router into a wall socket and not a surge protector as it may cause issues with your WiFi range. So, make sure to plug it directly into the wall, while doing the Wavlink ac1200 setup.
Reboot Is Primary Then Change The Channels
Just unplug the router from the wall socket in the beginning. Now, wait for a few seconds. After that, plug back in the router. Here you have to stop and wait for the router to restart and connect again. In the meantime, set up the Wavlink to channels 1, 6, or 11. If you are using a 2.4GHz router. vice versa, if you are using a 5GHz router, use channels 36, 40, or 44.
Ethernet Bond To Setup Wavlink Router
- To start with, connect the existing wavlink extender to the main Wavlink router and vice versa.
- Before beginning to use the router, connect the wavlink router to a power outlet and wait for at least five minutes.
- You will need an ethernet cable to connect your computer’s ethernet port to any one port out of the four ports on the Wavlink router.
- Connect automatically to the Wavlink WiFi router automatically at the setup wizard or wifi.wavlink.com portal. At the same step, as this is necessary for your computer
- Finally, reach the settings > then, choose the network settings> After that WiFi> Now, pick the add network >, therefore, select the WAN network from the projected list > Finally, type the password ‘admin’ and select the finish button.
Configure The Wavlink Router
This particular follow-up guide will help you, how to set up the router yourself without facing any problems in the configuration process too.
- In the configuration process of the wavlink router setup, you first need to Visit wifi.wavlink.com and log in there.
- After that, pick the WiFi settings in the main menu.
- Thereafter, you have to select the WiFi network to connect the main Wavlink Router.
- You need to enter the password to save the settings.
- But for sure, you have to reboot the router while performing the wavlink router Setup.
Outdated Settings Will Unable To Login
If your wifi.wavlink.com is not working, or you are facing any issues logging in to the Wavlink router, you should check the computer’s network settings. If the settings are incorrect or outdated, this can cause problems in connecting to your network and accessing the internet. These settings include:
- Check whether the network adapter is installed or not on your computer. The wireless adapter may be installed if you want to connect wirelessly, or ethernet wire if you want to connect it via an ethernet cable.
- The IP address of your router must be 192.168.10.1
We hope the Setup and troubleshooting combo guide is enough to eliminate the dead zones. In addition, to make the router compatible with the extender. Go for an Ap setup wavlink from the browser.